
Learn the safe way to putting a prong collar on your dog with our step-by-step guide, training tips, and maintenance advice.
Prong collars, often used for training purposes, are a type of dog collar that can be controversial. While some claim they are effective for managing strong or stubborn dogs, others argue they can be harmful if not used correctly. This article aims to guide dog owners on how to safely and properly fit a prong collar on their dog, ensuring the well-being of their pet during training sessions.
Key Takeaways
- Prong collars should be selected based on the dog’s size and the collar material to ensure safety and comfort.
- Introduce the prong collar to your dog gradually to build a positive association and prevent fear or aggression.
- The prong collar must be placed high on the dog’s neck and fit snugly to be effective and reduce the risk of injury.
- Use the prong collar as a training tool with consistent commands and reinforcement, and monitor the dog’s behavior closely.
- Regular maintenance of the prong collar is crucial, including checks for damage and proper cleaning, and it should not be used in all situations.
Understanding Prong Collars

What is a Prong Collar?
Let’s dive into what a prong collar actually is. Imagine a metal chain that wraps snugly around your dog’s neck, made up of small metal rings linked together. Each ring has blunt prongs that face inward, towards the dog’s skin. When you tug on the leash, these prongs apply even pressure around the neck, which is meant to mimic the corrective behavior of a mother dog nipping at her puppies.
It’s crucial to understand the mechanics of a prong collar to use it effectively and humanely. These collars are designed to help with training and behavior correction, but they must be used with care and knowledge of proper techniques.
The prong collar is often misunderstood, but when used correctly, it can be a valuable training tool.
Here’s a quick rundown of the key components of a prong collar:
- Metal chain
- Small metal rings
- Blunt inward-facing prongs
By getting familiar with these parts, you’ll be better prepared to fit and use the collar safely.
Benefits and Controversies
When it comes to prong collars, there’s a lot of debate among dog owners and trainers. On one hand, these collars can be highly effective for training and preventing pulling during walks. They provide a clear communication of boundaries to the dog, which can be especially helpful for strong, stubborn, or larger breeds. However, it’s crucial to understand that prong collars are not a one-size-fits-all solution and should be used with care and knowledge.
Controversies arise mainly from concerns about potential pain and injury to the dog if the collar is not used correctly. It’s a tool that demands respect and responsibility. Here’s a quick rundown of the pros and cons:
- Pros:
- Can correct behavior efficiently
- Mimics natural correction methods
- Adjustable to fit
- Cons:
- Risk of misuse
- Potential for injury
- Negative public perception
It’s essential to weigh these factors carefully and consider whether a prong collar is the right choice for you and your furry friend. Training should always be about building trust and a positive relationship, not fear or pain.
Selecting the Right Size and Material
When it comes to picking out a prong collar for your pooch, size matters just as much as the material. Getting the right fit is crucial; too loose and it won’t be effective, too tight and it could cause discomfort or even injury. Start by measuring your dog’s neck where the collar will sit and compare it to the manufacturer’s sizing chart.
Stainless steel and chrome-plated metal are two different materials, each with advantages and disadvantages. Stainless steel is rust-resistant and durable, making it an excellent long-term option. Chrome-plated choices may be less expensive, but they tend to chip and degrade over time. Here’s a quick overview of what to consider:
- Durability: How long will the material last under normal use?
- Comfort: Is the material smooth and free of sharp edges?
- Maintenance: How easy is it to clean and care for the collar?
- Allergies: Some dogs may have skin reactions to certain metals.
It’s essential to choose a collar that’s not only the right size but also made of a material that’s safe and comfortable for your dog.
Remember, no matter how good the collar is, if it doesn’t fit your dog, it’s not going to work for you. Always prioritize your dog’s comfort and safety when making your selection.
Preparing for the Putting a Prong Collar

Introducing Your Dog to the Collar
Before I even think about putting the prong collar on my pup, I make sure to introduce it in a non-threatening way. I start by letting my dog sniff the collar and get familiar with it during playtime or while we’re chilling together. It’s all about creating positive associations with the collar so that it doesn’t seem like a scary new thing.
After a few days of casual introductions, I’ll gently place the collar next to my dog while giving treats and praise. This helps reinforce that the collar is part of our normal routine. I’m careful to keep these sessions short and sweet, ensuring my dog stays relaxed and happy.
The key is to build trust and acceptance gradually, without rushing the process.
Once my dog seems comfortable with the presence of the prong collar, I’ll move on to the next steps of fitting it properly. Remember, patience is crucial here, and every dog will respond differently to new experiences.
Ensuring Your Dog is Calm and Comfortable
Before I even think about slipping the prong collar over my dog’s head, I make sure they’re as calm and comfortable as possible. This isn’t just about their immediate comfort; it’s about associating the collar with a positive experience. I start by finding a quiet space where we won’t be interrupted. It’s important to avoid any distractions that could make my dog anxious or overexcited.
Next, I’ll spend some time with them, engaging in soothing petting or a calm play session. This helps to release any pent-up energy and ensures they’re in a relaxed state of mind. The goal is to have my dog associate the prong collar with calmness and control, not punishment or constant wear as it’s a training tool only.
Patience is key during this process. If at any point my dog shows signs of discomfort or stress, I’ll take a step back and give them more time to adjust. It’s crucial to move at a pace that’s comfortable for them, ensuring the experience remains positive.
Gathering Necessary Tools and Accessories
Before we get started with the prong collar, let’s make sure we have everything we need. Having the right tools at hand will make the process smoother for both you and your furry friend. You’ll need the prong collar itself, of course, but also a flat collar and a leash. The flat collar is a backup safety measure, and the leash will help you control your dog during the fitting.
Here’s a quick checklist to ensure you’re prepared:
- Prong collar
- Flat buckle collar
- Leash
- Comfortable workspace
It’s essential to have a comfortable workspace where your dog can stand or sit calmly while you fit the collar. This could be a familiar room or a quiet outdoor area. Remember, the goal is to make this a positive experience for your pup, so take your time and be patient.
When fitting a prong collar, it’s crucial to ensure that each link is securely connected to avoid any potential for the collar to come apart. A secure fit is paramount for the safety and effectiveness of the collar.
Step-by-Step Guide to Putting on a Prong Collar

Connecting the Links
When I first got my hands on a prong collar, I was a bit intimidated by the assembly process. But trust me, it’s simpler than it looks. The key is to connect the links correctly to ensure the collar is effective and safe for your dog. Start by laying the collar flat on a table to identify the ends with the open hooks.
Connecting the links can be a bit fiddly, so here’s a quick rundown:
- Hold the collar in a ‘C’ shape with the prongs facing outward.
- Align the open hooks with the eyes on the opposite end.
- Press down and inward to snap the links together securely.
It’s crucial to make sure each link is firmly connected. A loose prong collar can be ineffective and may even come off, which is the last thing we want during a walk or training session.
Once you’ve got the hang of it, connecting and disconnecting the links becomes second nature. Just be patient and give yourself some time to practice.
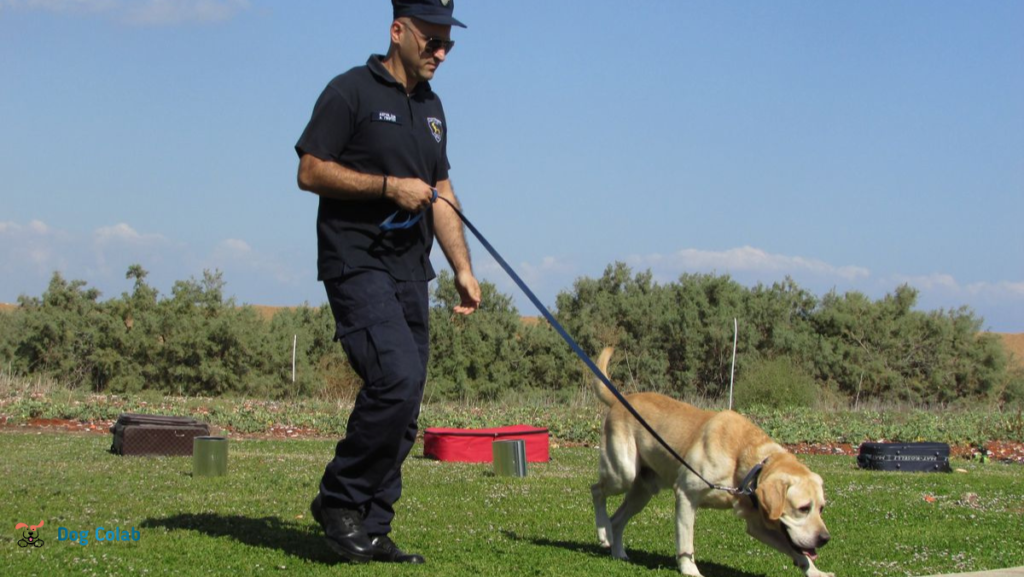
Proper Placement on the Neck
Once you’ve connected the links of the prong collar, it’s time to ensure it’s positioned correctly on your furry friend’s neck. The collar should sit right behind the ears and under the jaw, snug against the skin. This placement is crucial because it mimics the corrective behavior a mother dog uses with her pups, providing a natural area for correction without causing harm.
Proper placement is not just about where the collar sits, but also about how it fits. The prong collar should not slide down to the base of the neck nor should it be so tight that it’s uncomfortable for your dog. Here’s a quick checklist to make sure you’ve got it right:
- The collar is high up on the neck, just behind the ears.
- It’s snug but not too tight, allowing for two fingers to fit between a prong and the neck.
- The prongs are evenly distributed around the neck.
When you’ve got the placement right, you’ll notice that the collar communicates your guidance with gentle pressure, which is far more effective than a collar that’s incorrectly positioned. This is the foundation for effective training and communication with your dog.
Adjusting for a Secure Fit
Once you’ve got the prong collar connected and in place, it’s time to ensure it’s snug but not too tight. You want the collar to be high up on the neck, just behind the ears. This is the optimal position for control and comfort. To check the fit, you should be able to slip two fingers under the collar easily, but not much more. If the collar slides down or you can fit your whole hand under it, it’s too loose and needs adjusting.
Adjusting the fit may require adding or removing links. It’s a bit like fitting a watch; you want it to be just right. Here’s a quick guide to help you out:
- If the collar is too tight, remove a link one at a time until you achieve the desired fit.
- If it’s too loose, add a link at a time. Be patient and check the fit after each adjustment.
It’s crucial to get this step right. A well-fitted prong collar is effective and safe, while a poorly fitted one can cause discomfort or even injury.
Training Tips with a Prong Collar
Basic Commands and Reinforcement
Once you’ve got the prong collar on, it’s time to dive into training. I start with the basics, like ‘sit’ and ‘stay’. Consistency is key here. I make sure to use the same command every time and reward my pup with treats and praise for getting it right. It’s all about positive reinforcement.
Patience is also crucial. Some dogs might pick up commands quickly, while others need more time. I keep my training sessions short and sweet to keep my dog’s attention focused. Here’s a quick rundown of how I approach it:
- Introduce the command in a quiet environment
- Demonstrate the action, gently guiding if necessary
- Reward immediately after the correct behavior
- Repeat, gradually reducing guidance and treats
It’s important to use a training technique that interests your dog. Show him plenty of patience, consistency, and positive reinforcement to help teach him the basic commands.
Correcting Behavior with the Prong Collar
When it comes to correcting behavior with a prong collar, it’s crucial to understand that timing and consistency are key. You’ll want to ensure that corrections are made precisely at the moment of the unwanted behavior, so your dog can make the connection between their action and the correction. Here’s a simple approach:
- Observe your dog closely and identify the specific behavior you want to correct.
- At the exact moment the behavior occurs, give a quick, firm tug on the leash attached to the prong collar.
- Immediately follow up with the correct command or behavior you wish to see.
- Praise your dog enthusiastically when they perform the desired behavior.
It’s essential to maintain a calm and assertive demeanor throughout the process. Your dog will feed off your energy, so staying composed will help them understand that you’re guiding them, not punishing.
Remember, the goal is to create a positive association with the correct behavior. Over time, your dog should respond to verbal commands without the need for a correction. Always monitor your dog’s response to ensure they are not experiencing distress or discomfort.
Monitoring Your Dog’s Response
As I’ve been using the prong collar with my dog, I’ve learned that monitoring their response is crucial. It’s not just about correcting behavior; it’s about understanding how they’re coping with the training. Each dog is unique, and their reactions can vary widely. Some may respond well to gentle corrections, while others might need a more patient approach.
Observation is key here. I make a point to look for signs of stress or discomfort, such as excessive panting, drooling, or reluctance to move. If I notice any of these signs, I take a step back and reassess our approach. It’s important to ensure that the training experience is positive and not overwhelming for them.
- Watch for changes in body language
- Listen for changes in vocalization
- Feel for changes in tension on the leash
By staying attuned to my dog’s behavior, I can adjust our training sessions to be more effective and humane. This helps in building a stronger bond and ensures that the prong collar is a tool for communication, not punishment.


Correct Collar Placement Incorrect Collar Placement
Safety and Maintenance

Regular Checks for Wear and Tear
Just like you regularly check your car for any signs of wear or tear, it’s crucial to do the same for your dog’s prong collar. Regular inspection is key to ensuring the safety and longevity of the collar. Look out for any loose stitching, frayed edges, or damage to the material. These can be subtle signs that the collar is weakening and may not hold up, especially in critical situations.
Consistency in these checks is what will prevent any unexpected failures. I like to do a quick scan over the collar each time before I put it on my dog. It’s a simple habit that takes just a moment but can make a world of difference.
- Check each prong for stability
- Examine the chain for any signs of rust or weakness
- Feel along the collar for any sharp edges that could harm your dog
It’s not just about the immediate safety, but also about the comfort and well-being of your furry friend. A damaged collar can cause more than just an escape; it can lead to injuries or discomfort during use.
Types and Styles of Prong Collars


Cleaning and Storing the Prong Collar
After each training session, it’s crucial to clean your prong collar to ensure it remains in good condition. Start by wiping down the metal links with a damp cloth to remove any dirt or grime. If your collar is particularly dirty, you might need to soak it in warm soapy water before scrubbing gently with a soft brush. Always dry your collar completely to prevent rust or corrosion.
For storing the prong collar, find a dry place away from direct sunlight. I like to hang mine on a hook by the door so it’s handy for the next walk but out of reach of my curious pup. If you’re not planning to use the collar for an extended period, consider placing it in a breathable fabric bag to protect it from dust and moisture.
It’s important to handle the prong collar with care, even when not in use. A well-maintained collar ensures safety and comfort for your dog during training sessions.
Remember to periodically inspect your collar for any signs of wear or damage. If you notice any bent prongs or weak links, it’s time to replace the collar to maintain its effectiveness and safety.
When to Avoid Using a Prong Collar
It’s crucial to recognize when a prong collar isn’t the right tool for your pup. If your dog is already showing signs of fear or aggression, a prong collar may exacerbate these issues rather than help. Puppies under six months should also steer clear, as their necks are still developing.
Certain breeds with delicate neck structures, like Greyhounds, are more prone to injury with prong collars. Here’s a quick rundown of situations where you should avoid using a prong collar:
- Your dog is under six months old
- Your dog has a history of neck or trachea issues
- Your dog is prone to fear or aggression
- Your dog is of a breed with a delicate neck structure
Always consider alternative training methods and tools that might be more suitable and less risky for your dog’s specific needs and temperament.
Tips
Walks with a prong collar will take longer than walks with a regular collar because you may need to stop and start multiple times until your dog learns to walk without pulling. Give your prong collar training sessions enough time.
Summery
In conclusion, properly fitting and using a prong collar on your dog can be a safe and effective training tool when used responsibly. It’s crucial to ensure the collar is the correct size and is placed correctly on your dog’s neck to prevent discomfort or injury. Always introduce the prong collar gradually and with positive reinforcement to help your dog associate it with a positive experience. Remember to consult with a professional trainer if you’re unsure about using a prong collar or if your dog is not responding well to it. With patience and proper technique, a prong collar can be a valuable addition to your training regimen, helping to establish clear communication and boundaries with your furry friend.
FAQ’s
What exactly is a prong collar and how does it work?
A prong collar, also known as a pinch collar, is a training tool used for dogs that mimics the corrective action of a mother dog’s bite. It consists of metal links with prongs that, when pulled, apply pressure on the dog’s neck to correct unwanted behavior.
Are prong collars safe and humane to use on dogs?
The safety and humaneness of prong collars are debated. When used correctly and under professional guidance, they can be effective without causing harm. However, misuse can lead to injury or behavioral issues, and they are not suitable for all dogs.
How do I choose the right size prong collar for my dog?
To select the correct size prong collar, measure your dog’s neck and add 2 inches for the proper fit. The collar should sit high up on the neck, just below the ears, and be snug enough to prevent slipping without causing discomfort.
Can I use a prong collar on a puppy?
Prong collars are not recommended for puppies or very young dogs. Their necks are more sensitive, and they require gentler training methods. It’s best to consult with a professional trainer for alternative options.
How do I introduce my dog to a prong collar for the first time?
Introduce the prong collar gradually, allowing your dog to sniff and become familiar with it before putting it on. Pair the collar with positive experiences, like treats and praise, to create a positive association.
What should I do if my dog seems uncomfortable or in pain with the prong collar?
If your dog shows signs of discomfort or pain, immediately remove the collar and consult with a professional trainer. The collar may be improperly fitted, or it might not be the right training tool for your dog.